Configuration
There are two ways to create a hub: automatically through add-on discovery (recommended), or manually for any other rtl_433 server. Each hub points at one rtl_433 server's WebSocket endpoint.
Home Assistant OS Add-On Discovery
If you run the rtl_433 add-on on Home Assistant OS, each radio it detects is published through Supervisor discovery. It appears under Settings → Devices & Services as a discovered rtl_433 card. Click Add and confirm; no host or port needs to be typed.
For discovery to work, this integration must already be installed and loaded when the add-on starts — install the integration, restart Home Assistant, and then start the add-on. If you started the add-on first and no card appeared, restart the add-on so it republishes discovery.
Discovered radios use the add-on's stable per-radio identifier, so the same hub and nested-device history can survive add-on restarts and USB port changes. For multi-dongle setups, stability is best when each dongle stays in a fixed USB port or has a unique serial.
Manual Configuration
Add a hub from Settings → Devices & Services → Add Integration → rtl_433.
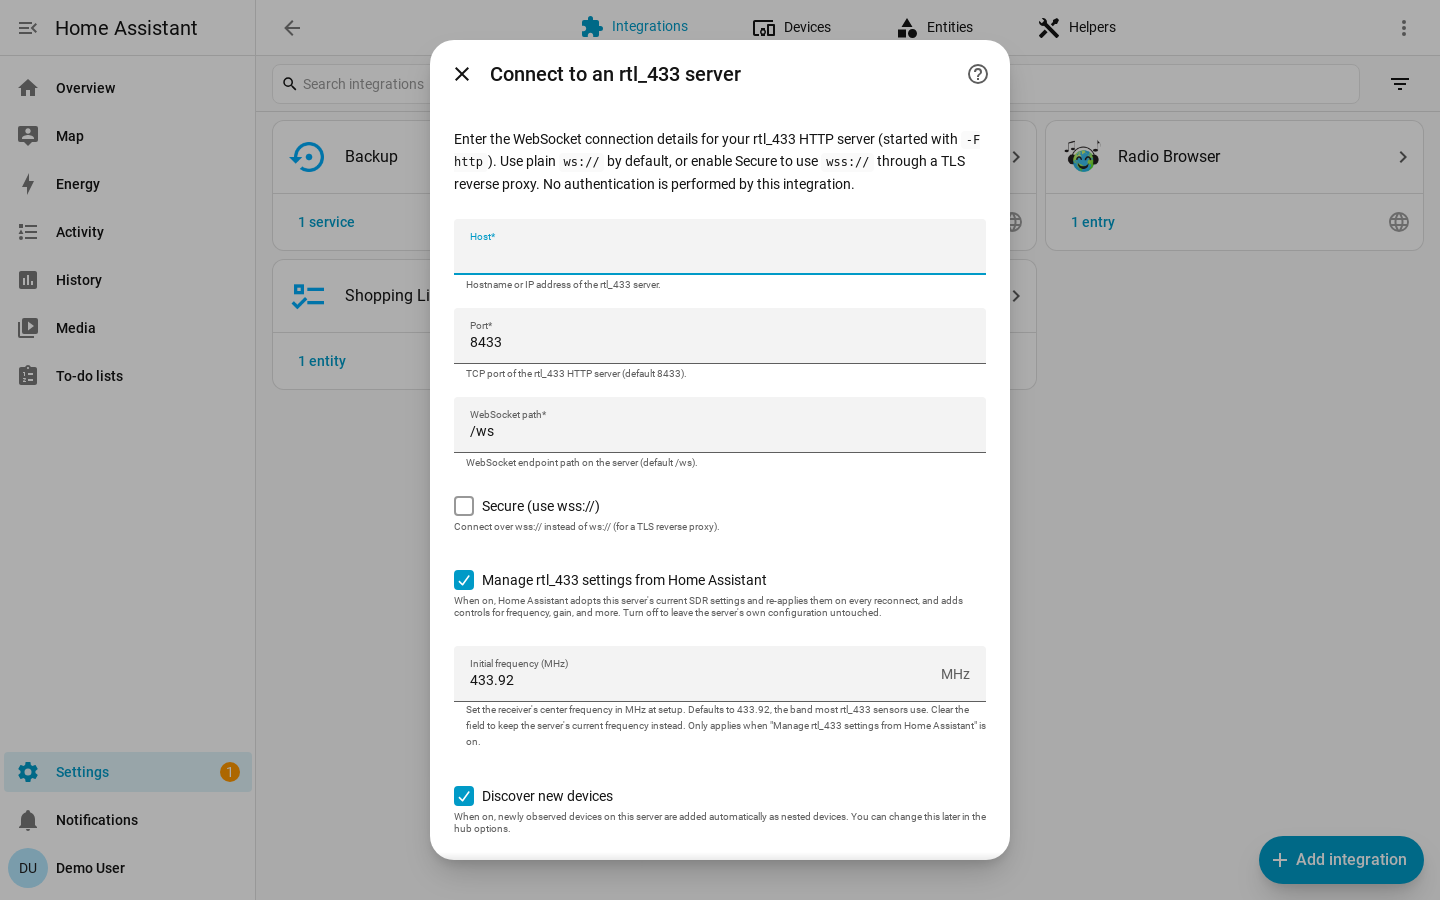
| Field | Default | Description |
|---|---|---|
| Host | required | Hostname or IP of the machine running rtl_433. |
| Port | 8433 |
The rtl_433 HTTP API port. |
| Path | /ws |
The WebSocket path on the rtl_433 HTTP server. |
| Secure | off | Connect with wss:// instead of ws://. |
| Manage rtl_433 settings from Home Assistant | on | Expose SDR controls and let Home Assistant adopt and enforce receiver settings. |
| Initial frequency (MHz) | 433.92 |
Center frequency to apply once on first connect when managed settings are enabled. |
The integration validates that the WebSocket can be reached before creating the
hub. Manual hub identity is derived from host:port, so the same server cannot
be added twice.
Manual rtl_433 Configuration
The integration connects to rtl_433's HTTP/WebSocket server. Start rtl_433 with HTTP output enabled, for example:
rtl_433 -F http
By default rtl_433 binds to 0.0.0.0:8433. For localhost-only operation, use a
bind address such as:
rtl_433 -F http://127.0.0.1:8433
Event Timestamps
Every time Home Assistant connects, rtl_433 re-broadcasts a short buffer of
recent events. The integration reads the time field on each frame to tell that
backlog apart from traffic it is hearing live, so devices that have gone quiet
are not marked available again and their event entities and device triggers do
not fire a second time.
That only works if the timestamps can be read. rtl_433 emits time as a JSON
string in every mode, and these formats are understood:
| rtl_433 setting | Example time |
|
|---|---|---|
| default | 2026-05-25 10:00:00 |
Local wall clock, whole seconds. |
time:iso |
2026-05-25T10:00:00 |
ISO-8601. Local, unless you add tz or utc. |
time:unix |
1779703200 |
Epoch seconds, always UTC. |
time:off |
(no field) | Timestamps off — see below. |
Adding usec to any of them (time:iso:usec) adds a fractional part, and tz
(or utc) makes the zone explicit. Be explicit if you can: a bare local stamp is
read in Home Assistant's own time zone, so a server in a different zone puts
every event hours away from where it belongs. When that lands in the past, each
frame looks like an event from an old disconnection: values still seed, but
devices stop refreshing their last-seen and go unavailable, and event entities
and device triggers stop firing.
With no readable timestamp the integration cannot distinguish a replay from a live transmission, so it treats every frame as live — the safe direction for a real event, but it means the re-broadcast backlog is ingested afresh on each reconnect.
The recommended setting is the most precise one:
report_meta time:iso:usec:tz
or, on the command line, -M time:iso:usec:tz. A sub-second stamp also lets the
integration separate two transmissions from the same device inside one second.
Reconfigure vs Configure
Use Reconfigure to point an existing hub at the same server's new address: host, port, path, or secure mode. Devices and their history are preserved.
Use Configure to open the rtl_433 page. It is where devices are added and ignored — see Adding Devices to Home Assistant — and it carries three settings pages:
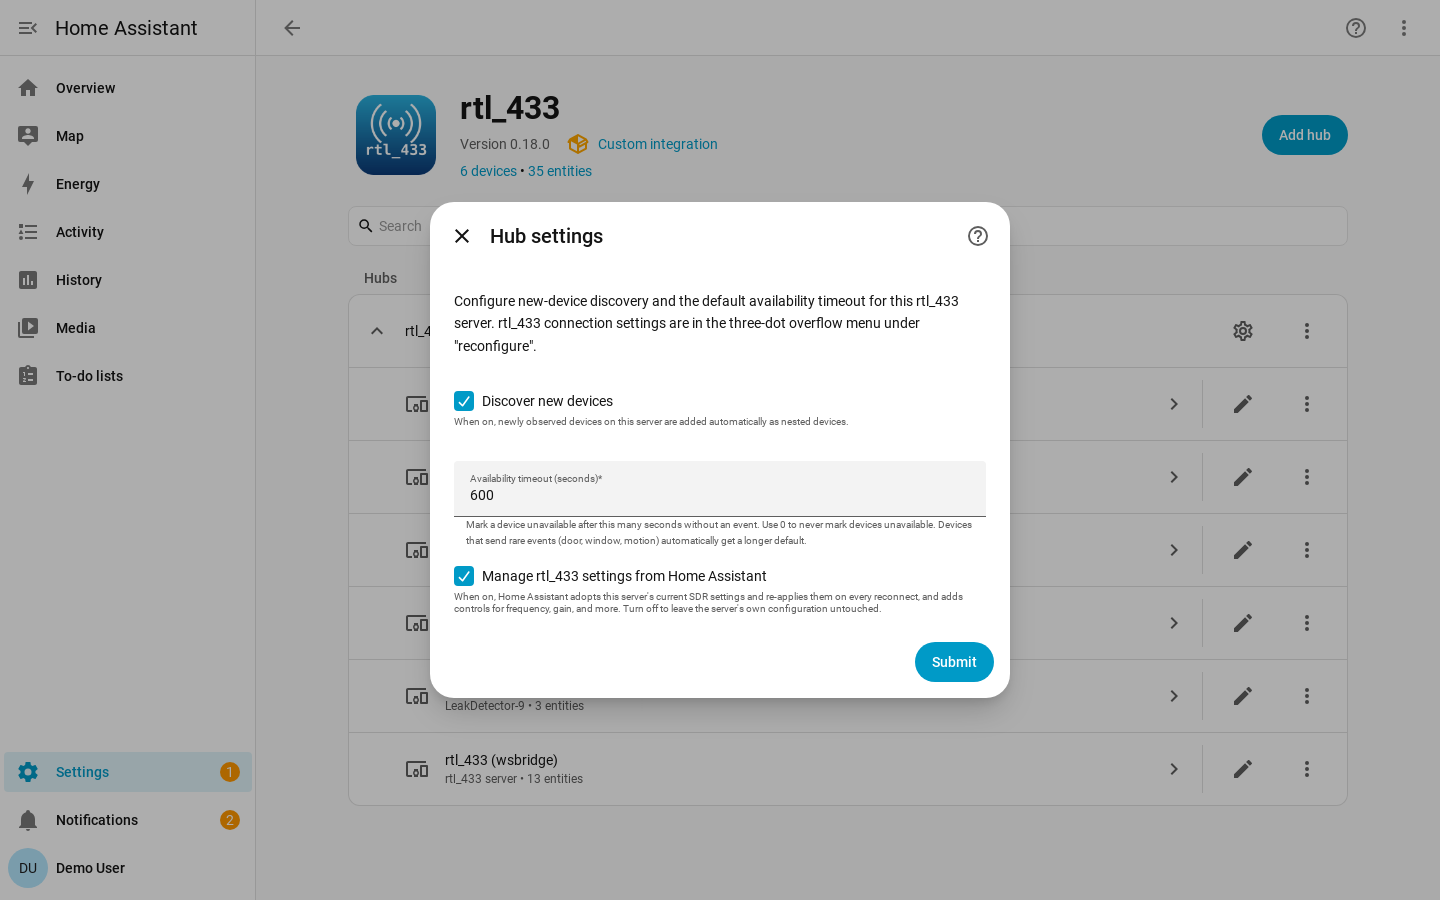
- Receiver settings: default availability timeout and the managed-settings toggle.
- Device settings: one device's availability timeout, motion clear delay, and utility-meter calibration.
- Device mappings: this receiver's mapping overrides.
Receiver settings configures the default availability timeout for every device on the hub, and whether Home Assistant manages the server's SDR settings. The timeout is one of three choices rather than a bare number:
- Per-device-type defaults — the default, and what keeps event-driven devices (doorbells, motion, contacts) from going unavailable on silence.
- Never expire — nothing on this receiver is ever marked unavailable for going quiet.
- A fixed timeout — a count of seconds that applies to every device without an override of its own.
Device settings targets one device for a timeout override, motion clear delay, or utility-meter calibration.
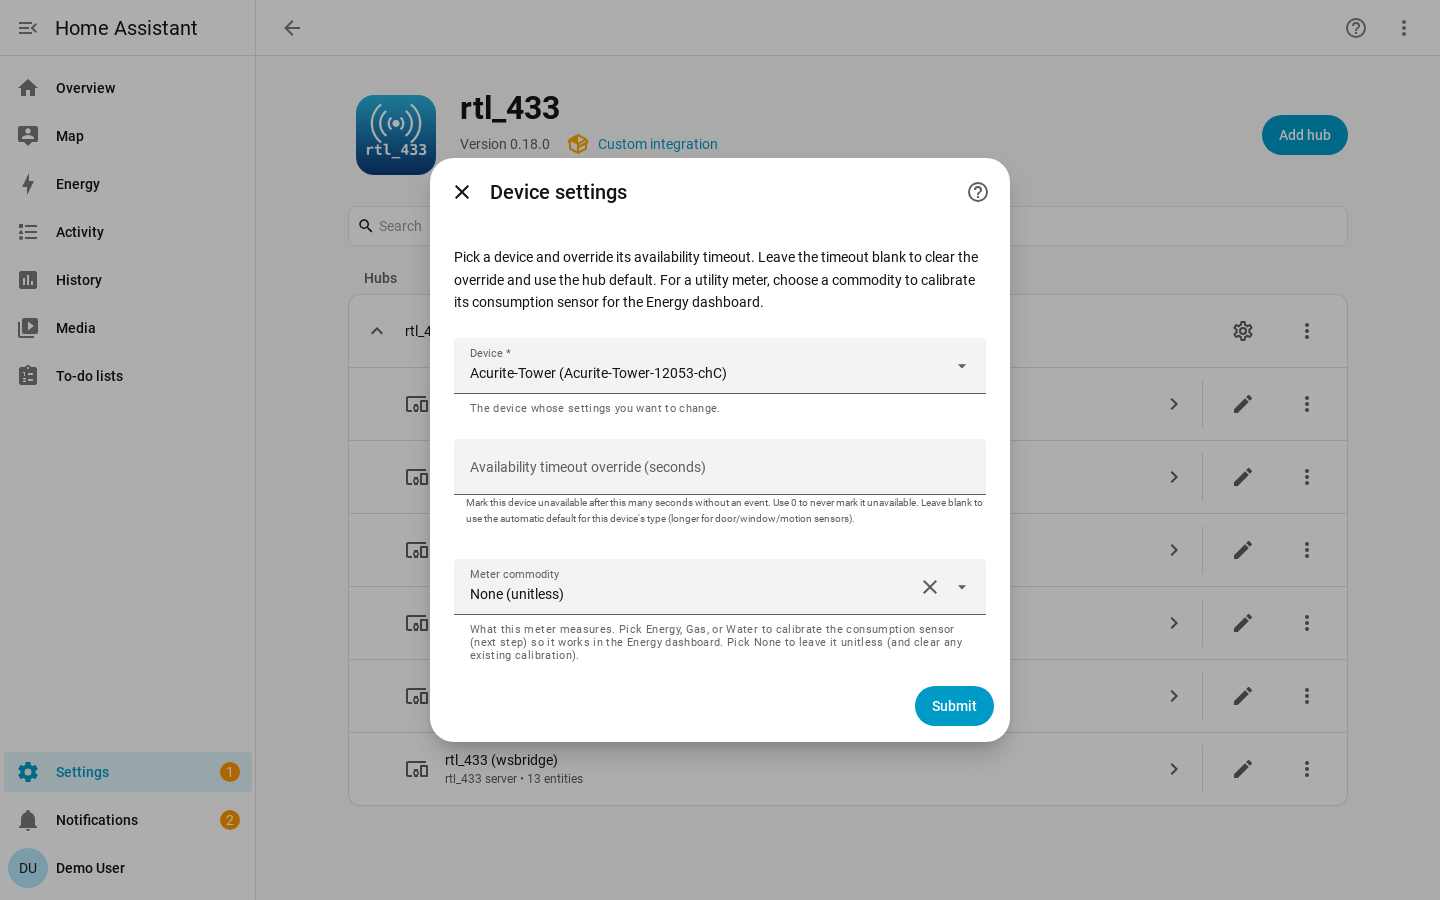
Changing timeout options applies live. Changing the managed-settings toggle reloads the hub because the entity set changes.
ws, wss, and Authentication
By default the integration connects to ws://host:port/path. Turning on
Secure connects with wss://.
rtl_433's built-in HTTP server does not terminate TLS. To use wss://, put a
TLS reverse proxy such as nginx or Caddy in front of rtl_433 and point the hub at
the proxy.
rtl_433's HTTP API is unauthenticated, and the integration sends no credentials. If you need access control, restrict it on your network or place it behind a reverse proxy.